The input data was generated by mapping the RNA-seq reads to the Arabidopsis thaliana reference cDNAs separately using the Bowtie short read aligner (Langmead et al., Genome Biology 2009), and then merging the result files using samtools (Li et al., Bioinformatics 2009) into one SAM file. To reduce the size of the set, only transcripts having names starting with "AT5G01" were selected.
Download the input SAM file by right clicking this link (15 MB):AT5G01.sam, and startup QualitySNPng. Choose "Run QualitySNPng" from the "Run" menu and select the file you just downloaded as contig file (figure 1). Now press the "Edit..." to edit the configuration.
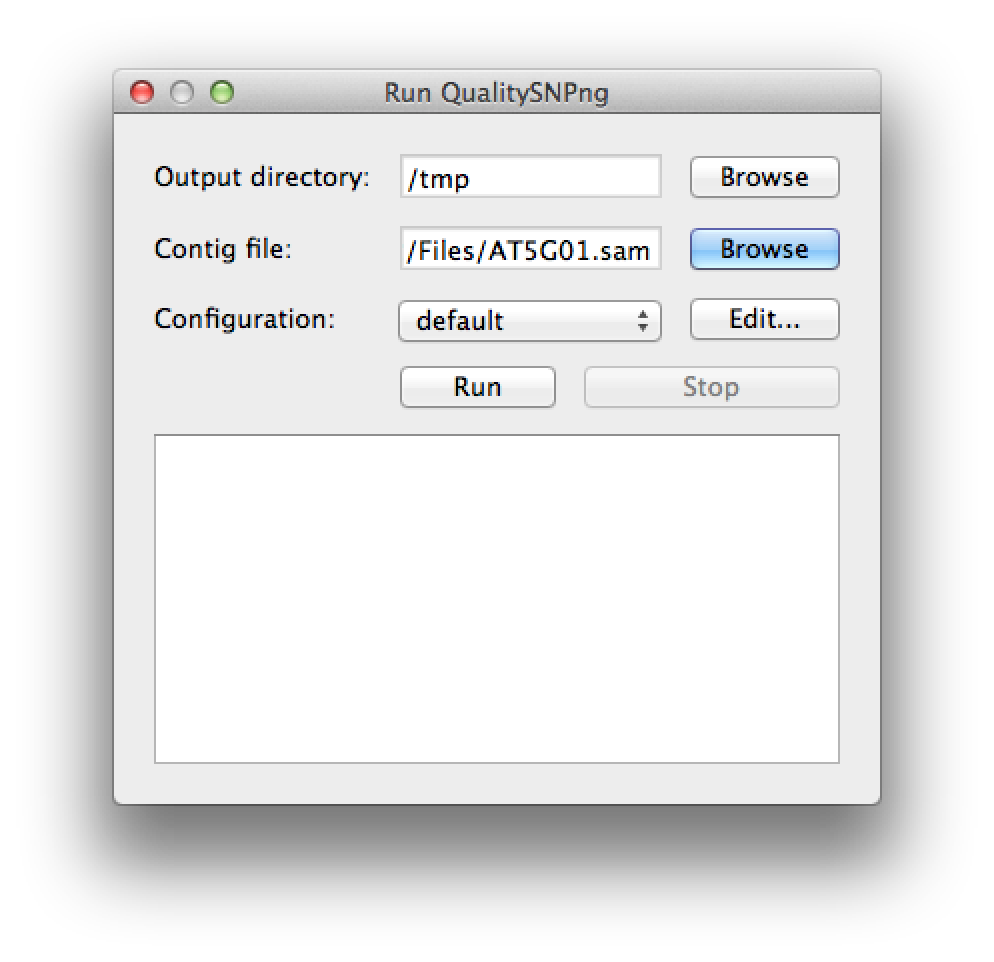 Figure 1. select the input file |
In the configuration dialog (figure 2) set the name of the configuration to "AT5G01" to make sure it is save under a new name. Set the minimal percentage of reads per allele to 25% to avoid picking up incidental sequencing or alignment errors as SNPs. Also set the "minimal number of read per allele" to 10, to make sure that each allele at least is suported by 10 reads. Just to be sure, we set the first and last nucleotide of each read to be of low quality, since SNPs that are only based on these regions are usually not reliable. Set the "minimal number of reads" for haplotyping to 10 and the "maximal number of SNPs in the flank" to 1, check "use IUPAC in flanks". Press "Ok" to save the configuration.
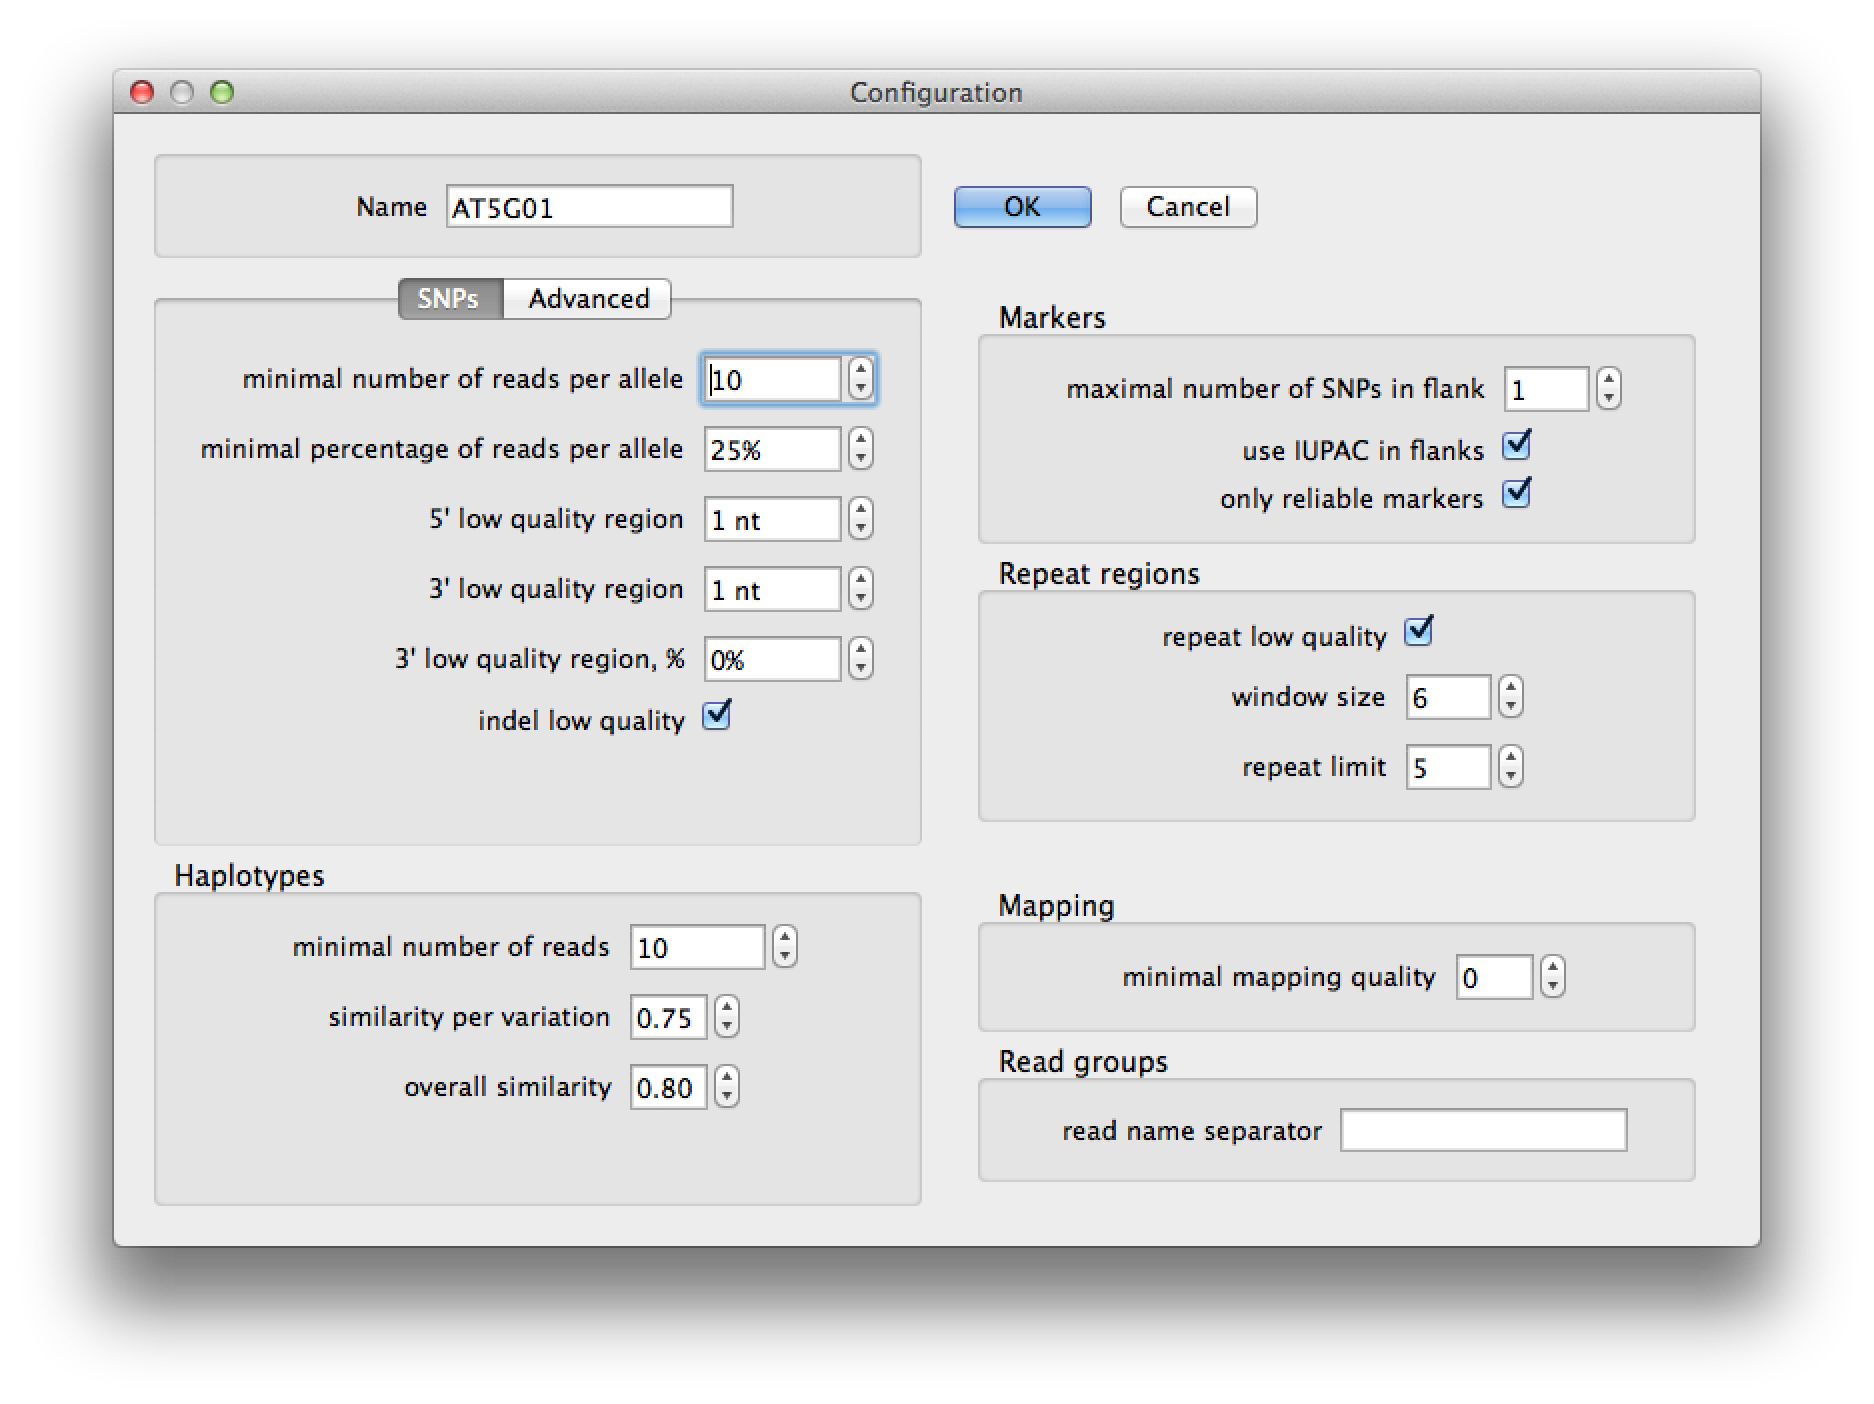 Figure 2. configuration dialog |
The "AT5G01 configuration should now be selected as the active configuration (figure 3), press the run button to start SNP detection.
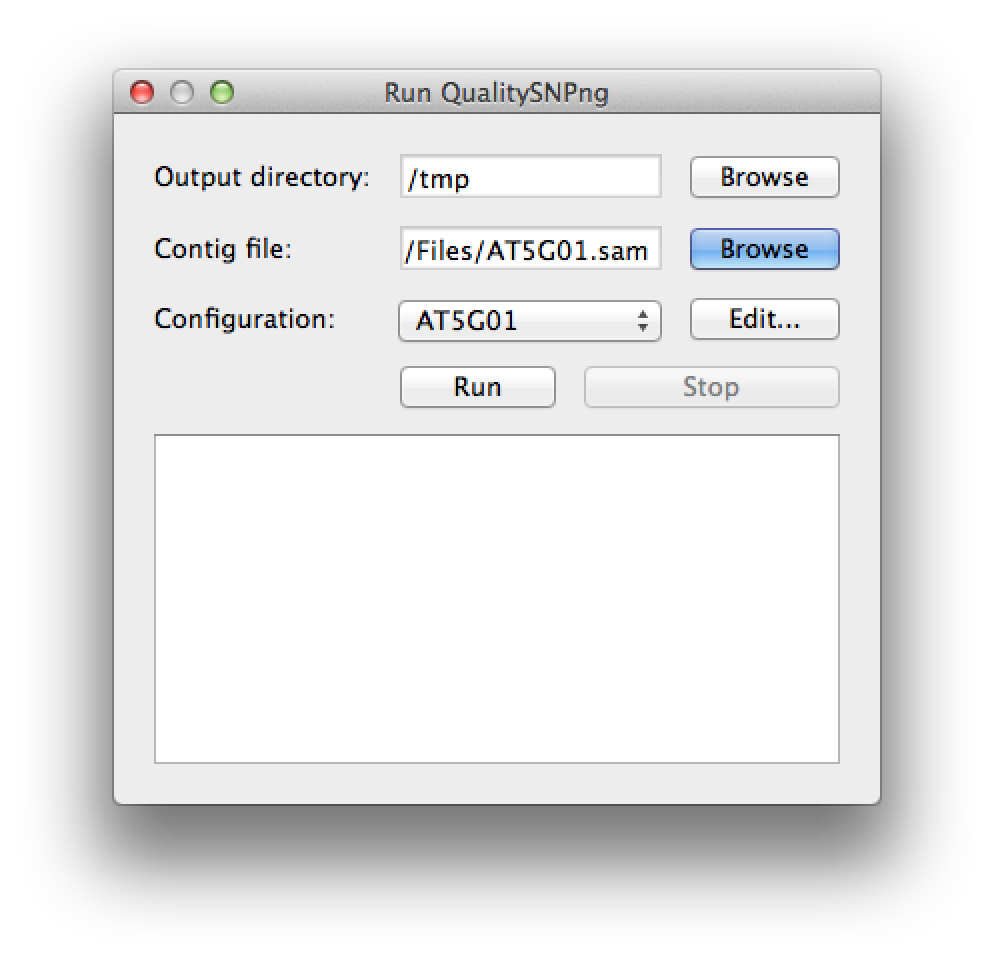 Figure 3. ready to start SNP calling |
When all 128 contigs (transcripts) have been processed, the "Stop" button will change to "Show" (figure 4). Press this button to view the results.
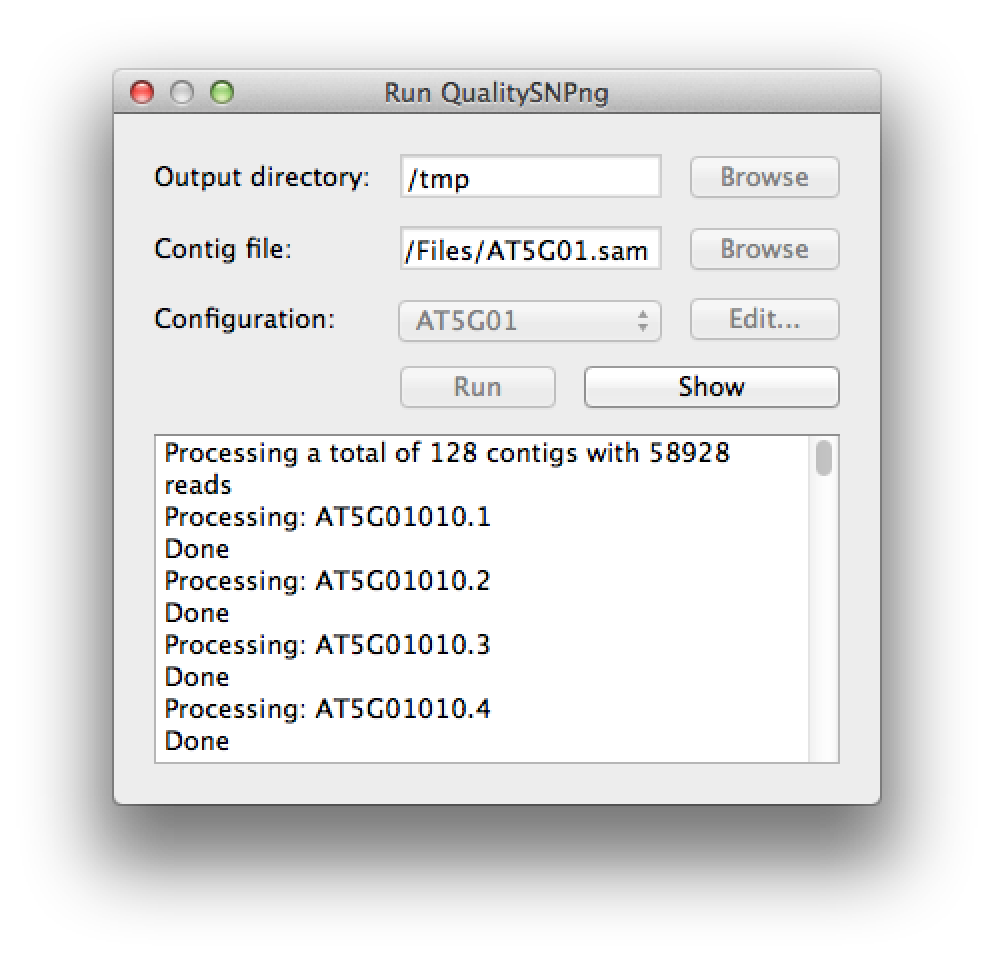 Figure 4. the run has finished |
Now you see a list of 11 contigs, apparently the other 117 did not have any SNPs between Col0 and Can0 (figure 5). You can set the minimum filter for the SNPs to 0 to verify that this is indeed the case. Now select AT5G01800.1 to see the results for this transcript.
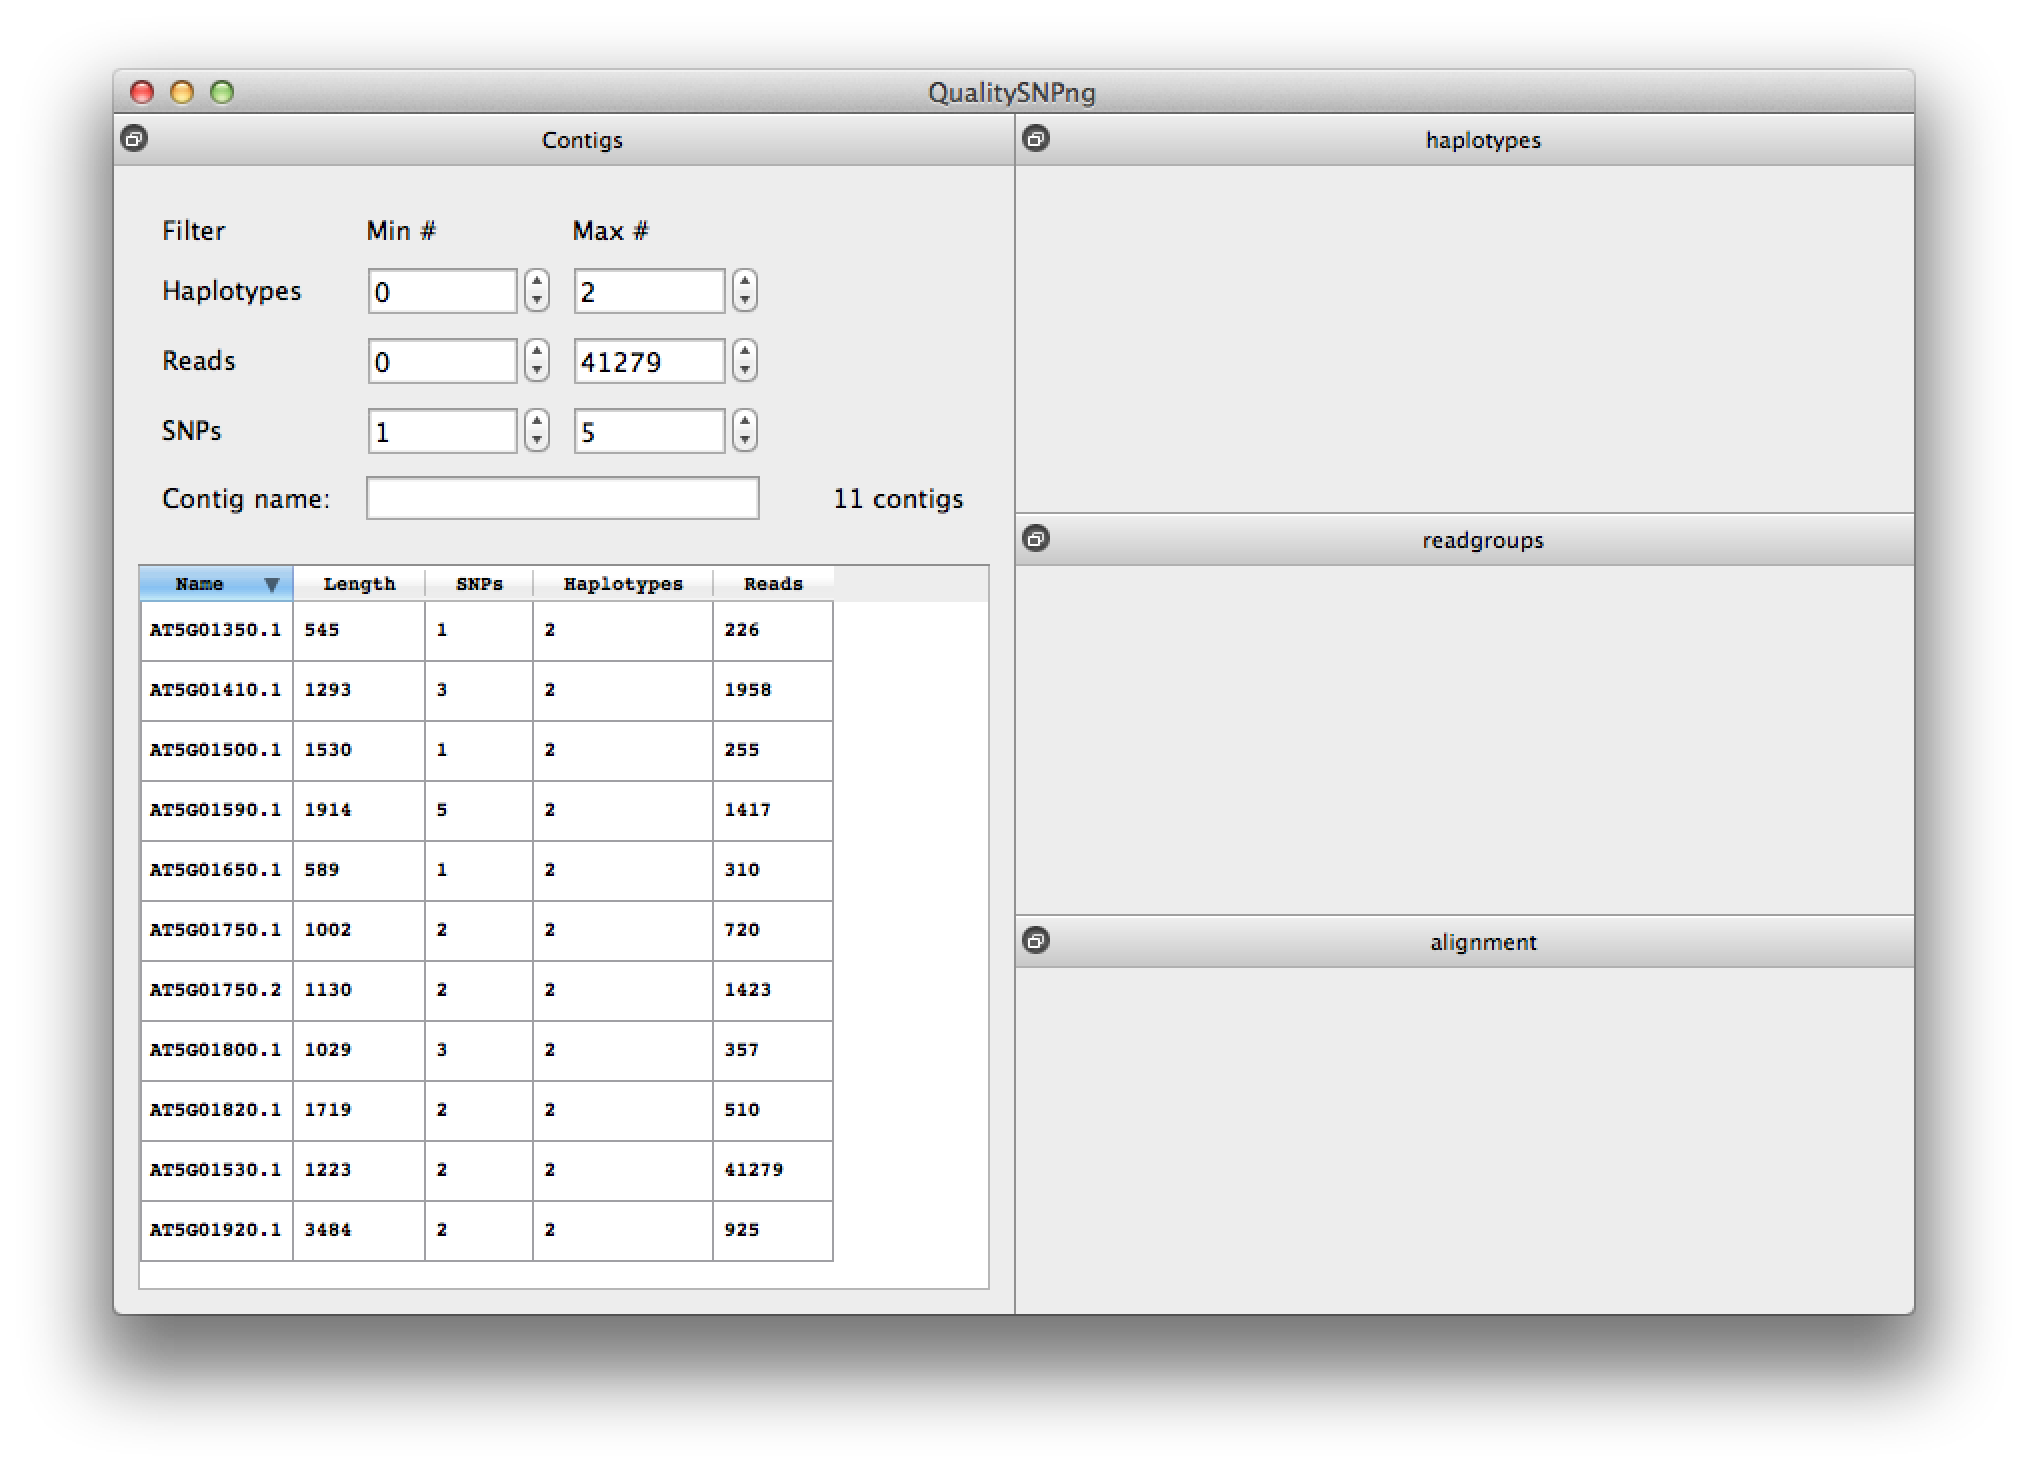 Figure 5. list of contigs (transcripts) |
For transcript AT5G01800.1 three SNPs were predicted and two haplotypes, although four haplotypes are listed because the first SNP could not be linked to the second and third. The overview per accession in the middle right table shows that haplotypes 1 and 4, and haplotypes 2 and 3 should be together.
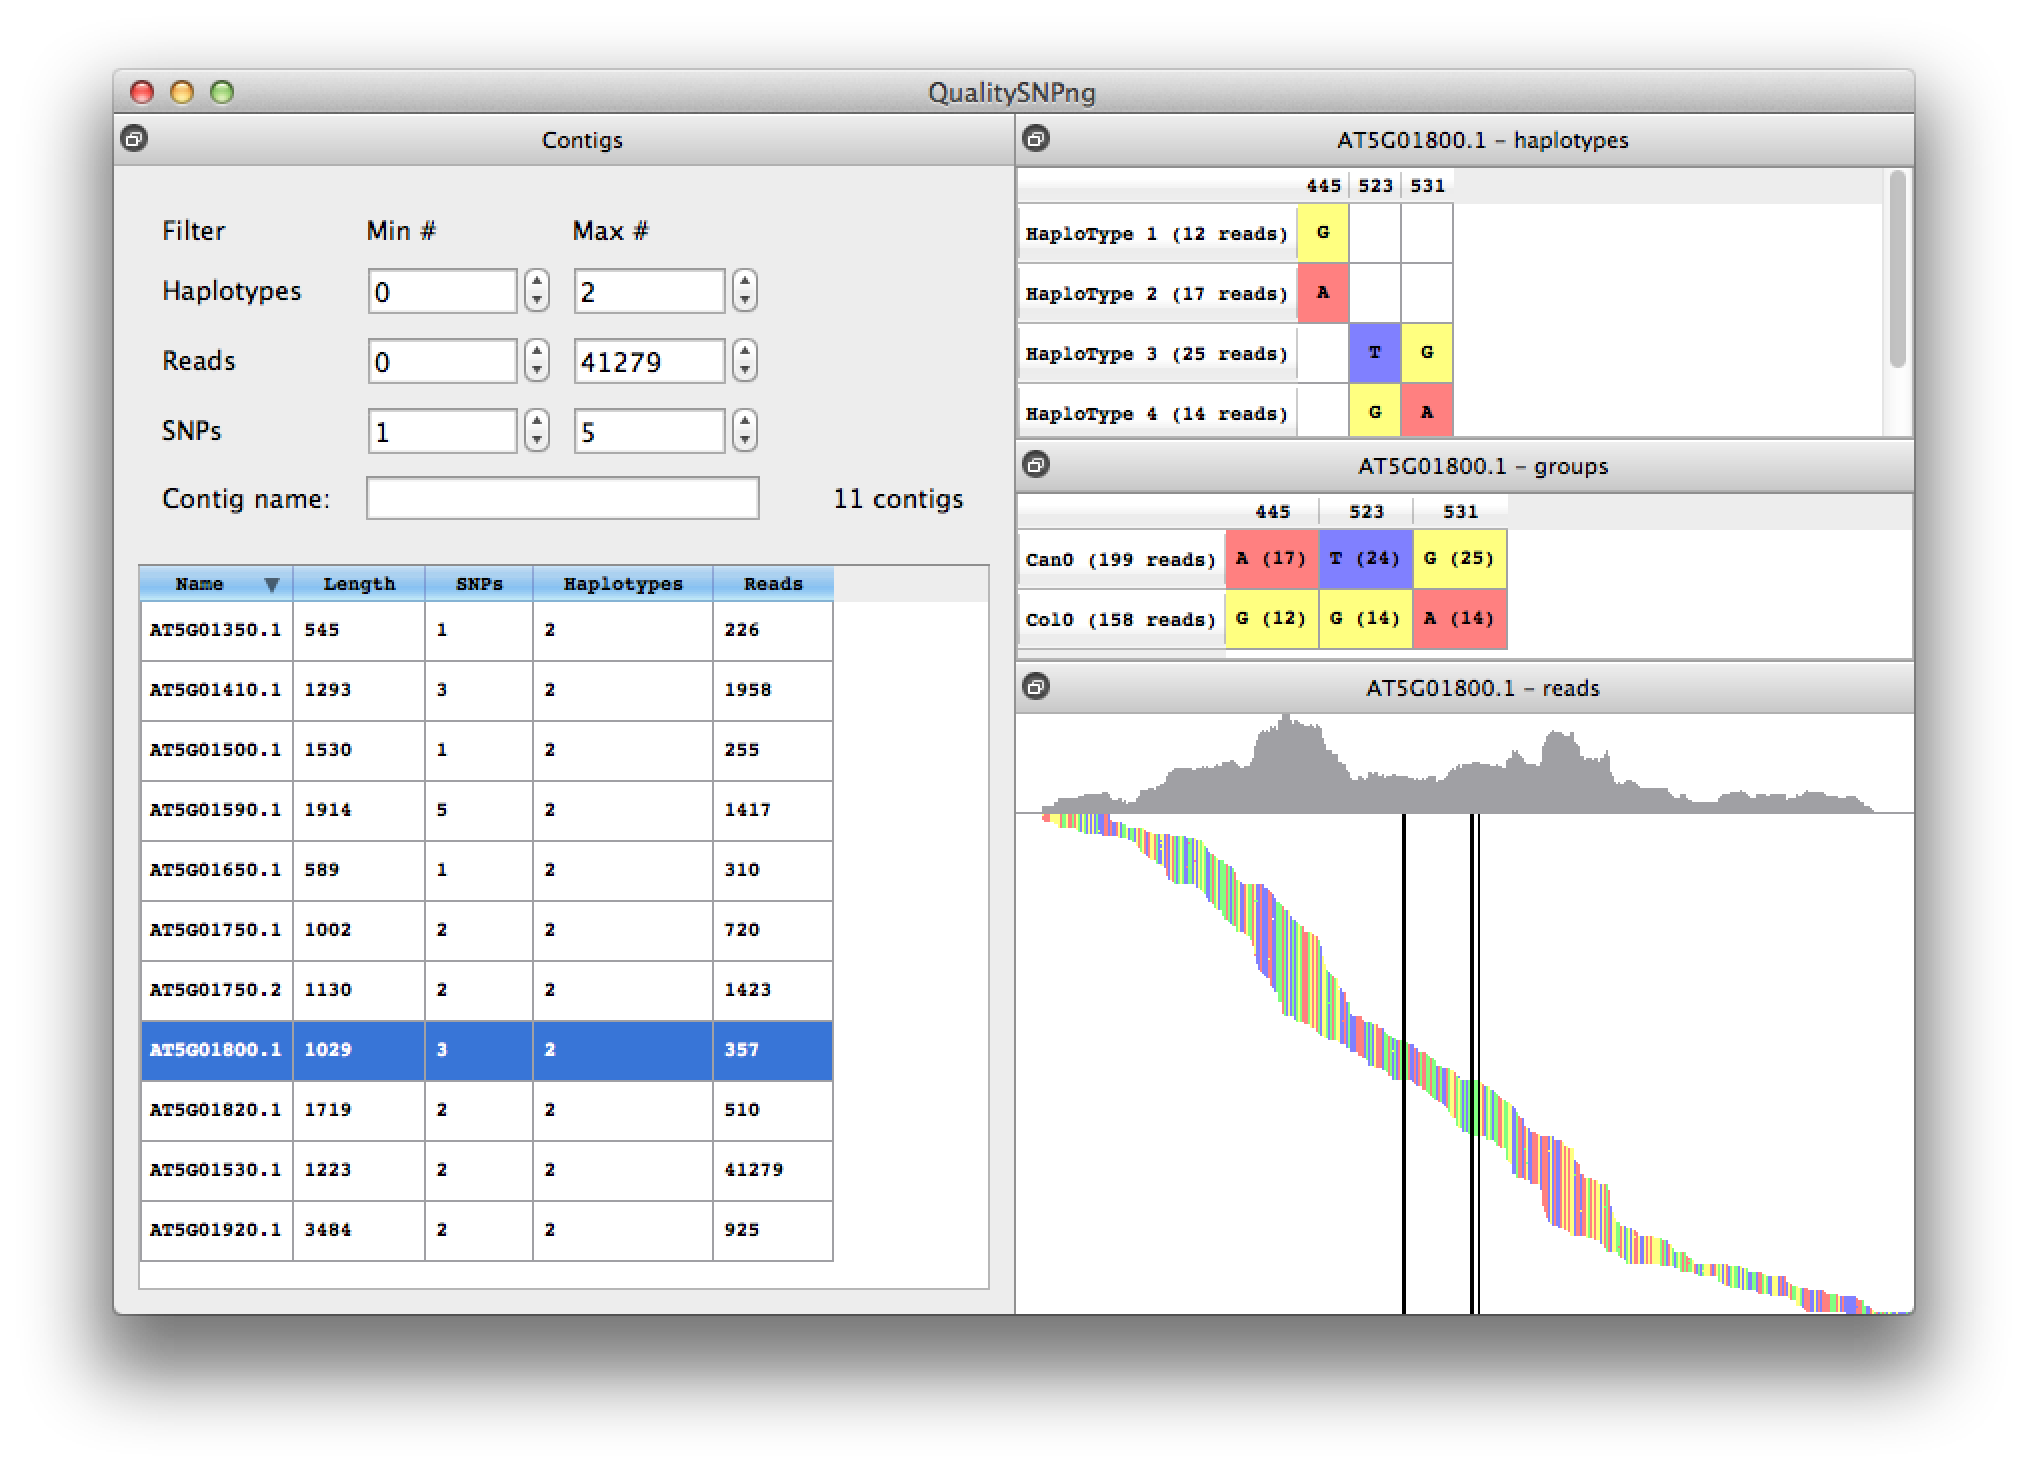 Figure 6. results for transcript AT5G01800.1 |
Click on the read alignment with the right mouse button and select "sort by haplotype". Zoom in to see that indeed the last read in haplotypes 1 and 2 do not reach the SNP at position 523 (figure 7). You will also notice some 'potential' SNPs in the alignment that were filtered out because their minor allele frequency was too low.
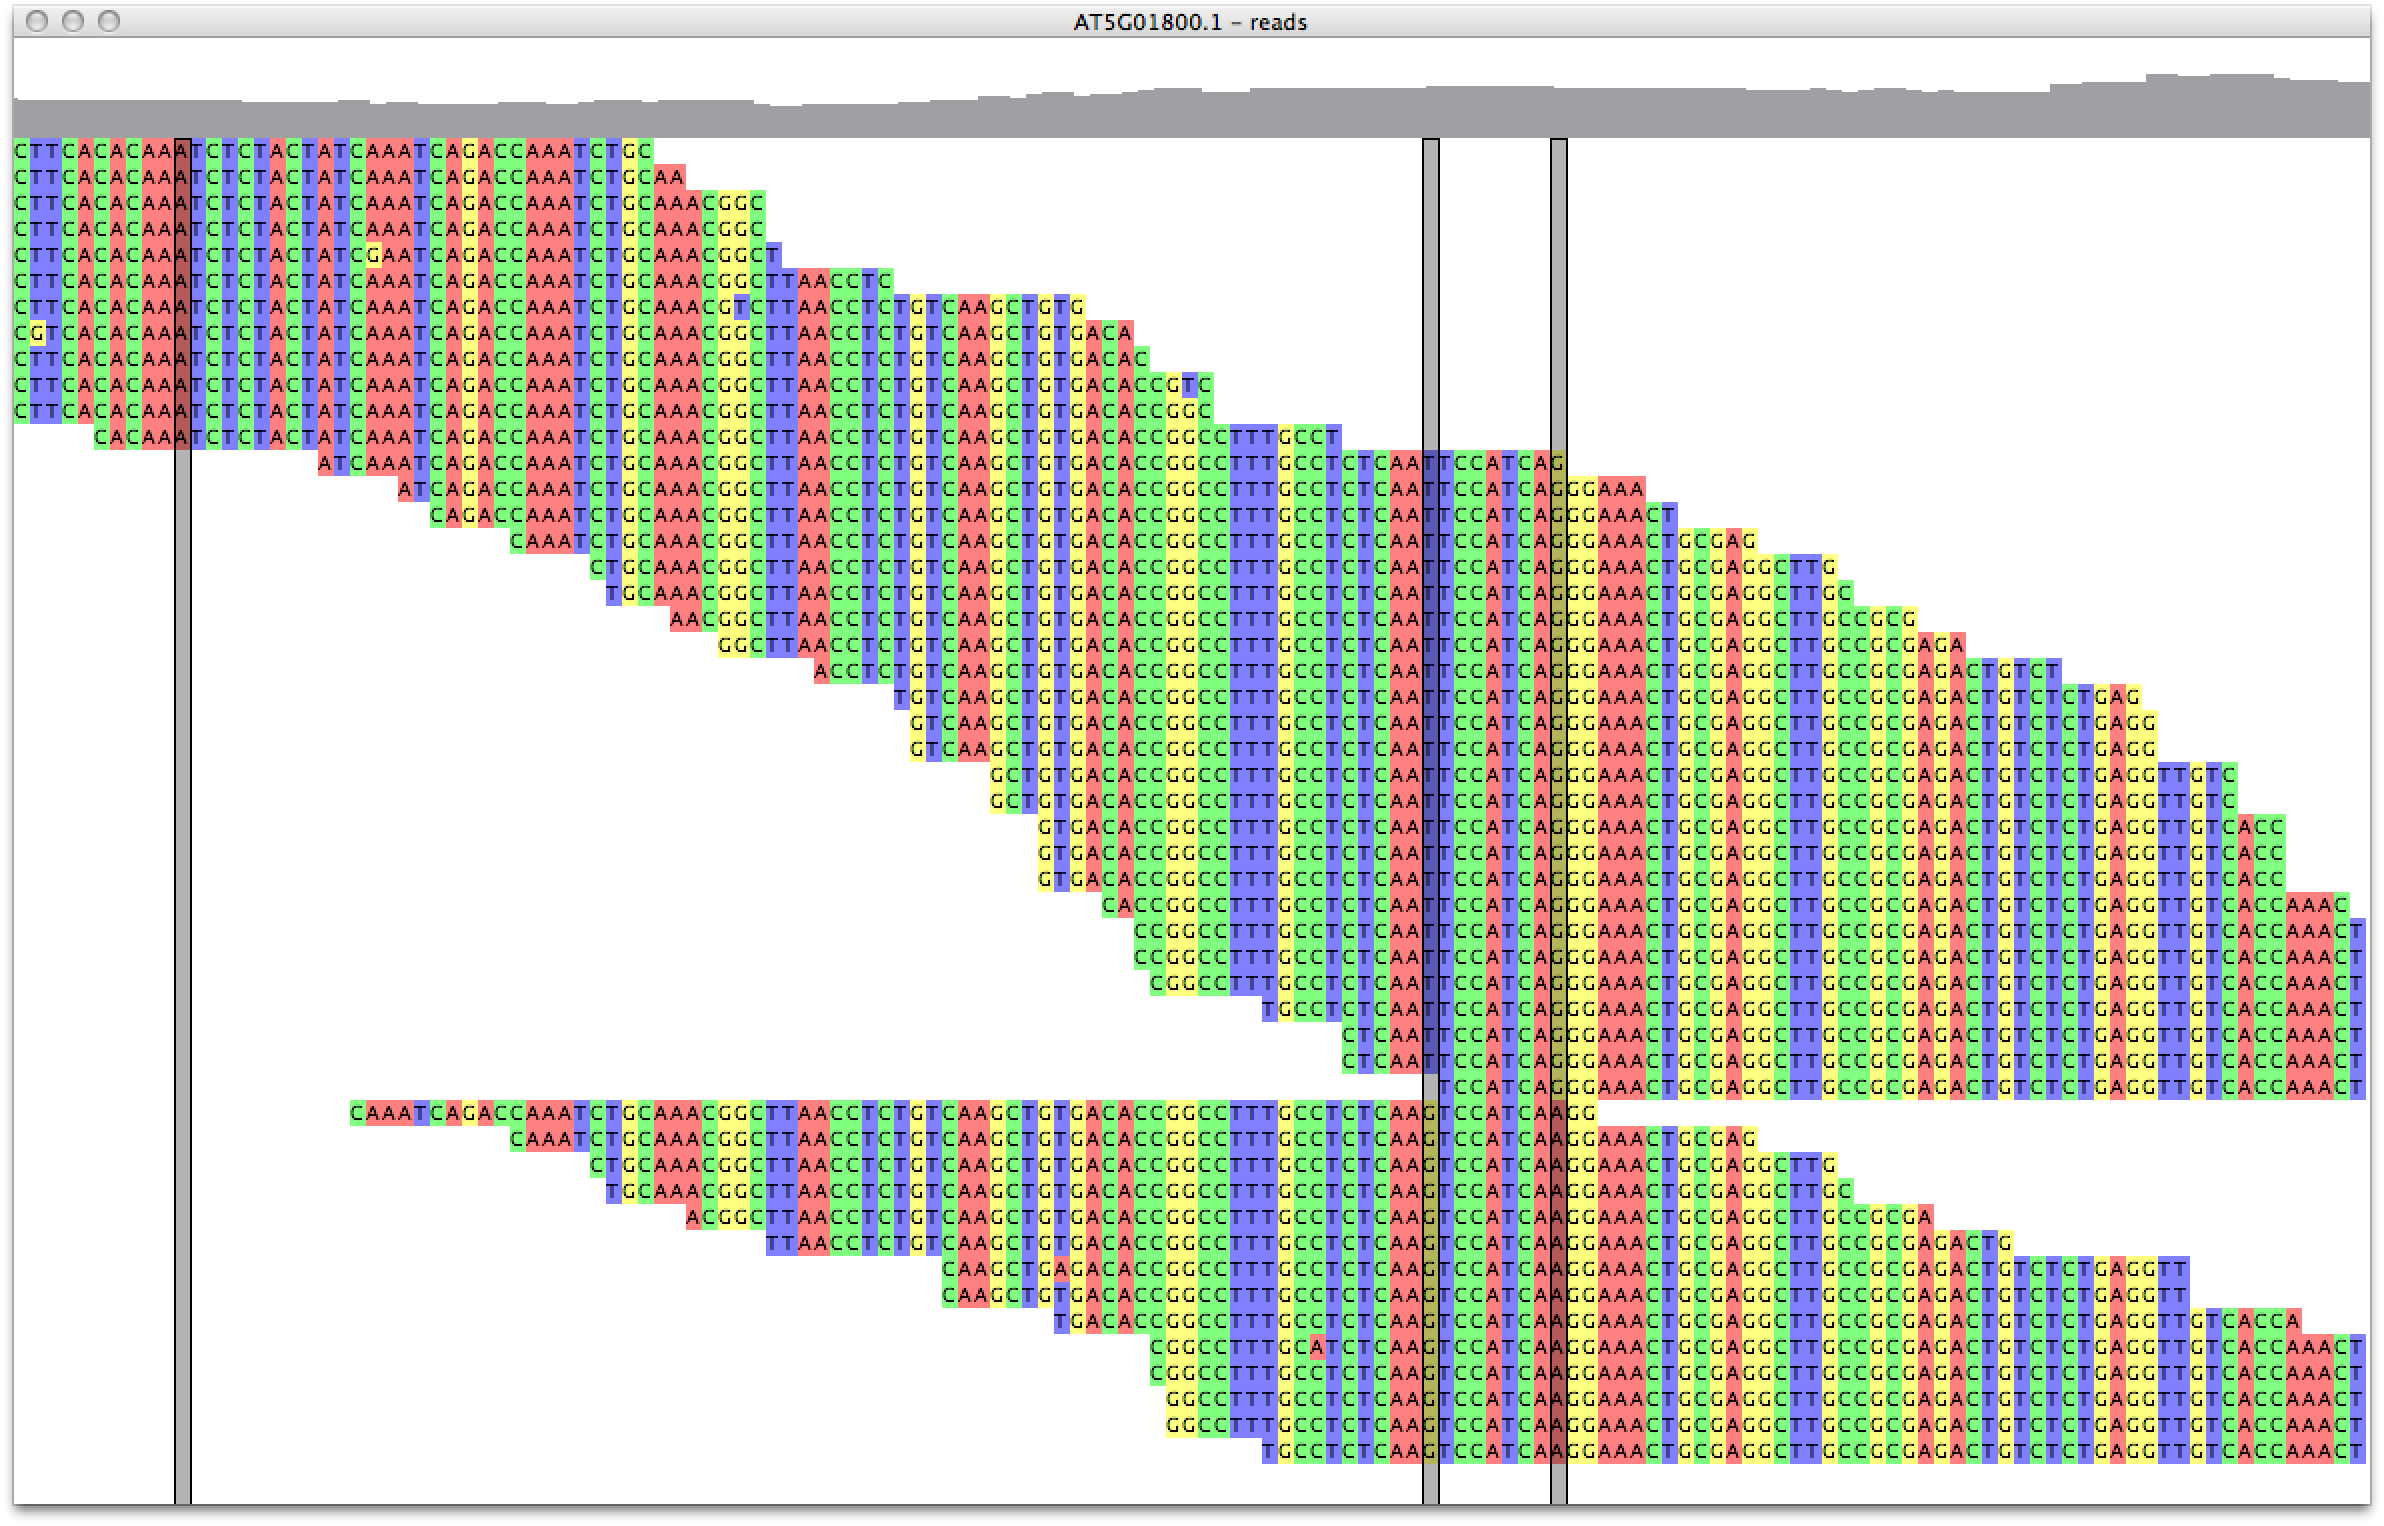 Figure 7. inspecting the haplotypes |
From the "File" menu select "Export marker list". For flank size fill in 50, to get 50 nucleotides on both sides of the SNPs (Figure 8). The resulting table shows the sequences for the marker SNPs, with their position on the different transcripts. You can export this list to a CSV file that can be imported in Excel for further processing.
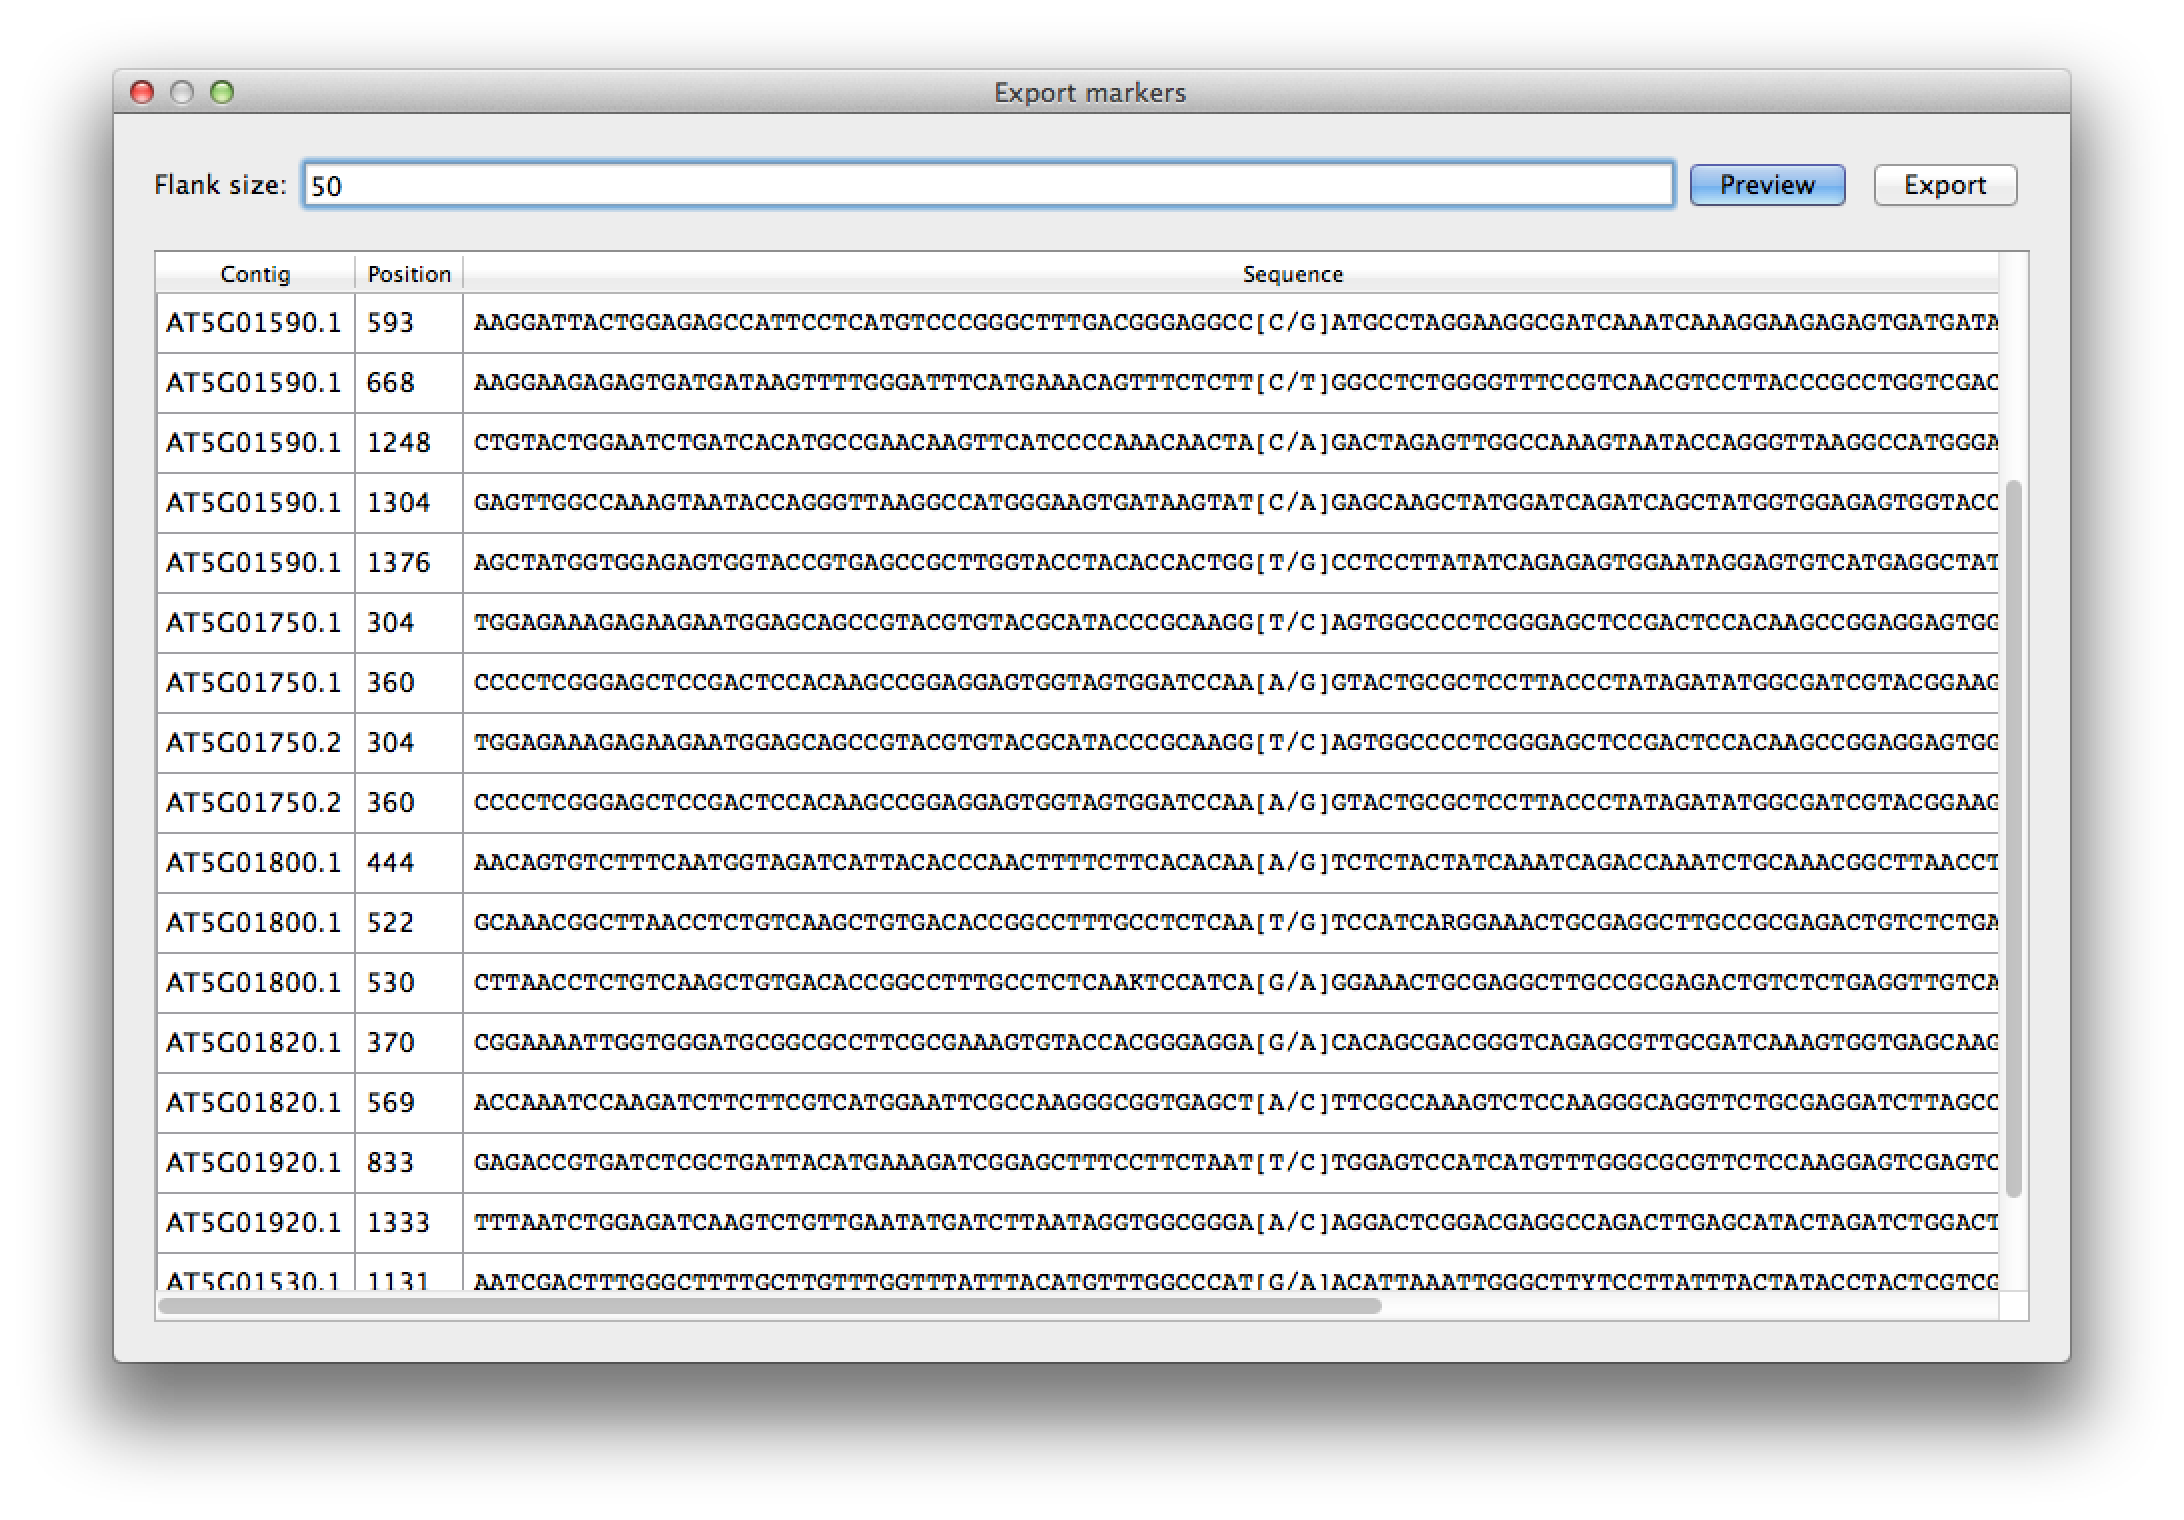 Figure 8. marker export |